

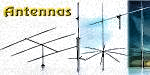
Log Periodic Dipole array (LPDA)
In this article, we will, however, focus mainly on the LPDA is its classic configuration along with several other offshoot derivatives. The LPDA is used extensively for HF, VHF, and UHF radio communications. The distinctive feature of the LPDA in comparison to other well-known antennas like the Yagi, Cubical Quads, etc is that unlike the other two, the LPDA features a very broad bandwidth characteristic. Physical the LPDA might appear to look more-or-less similar in structure to the Yagi, with multiple dipole elements on a boom with progressively reducing element length in its forward direction but the similarity ends there. All the elements of an LPDA are actively driven elements fed via an electrically connected transmission line, unlike the Yagi which only has one active driven element while the rest of the Yagi elements are parasitically coupled via mutual field induction.
Moreover, the LPDA is physically much larger than a typical Yagi if one were to compare them on the basis of size to gain ratio. Typically an LPDA covering a broad frequency bandwidth span of 2:1 (say 14-28 MHz) might comprise of 14-21 elements and produce a gain of 6.5 dBi in free-space, whereas, a 3-element Yagi which would be far smaller and lighter will produce a similar gain. The tradeoff is the bandwidth. Our example LPDA covers 14-28 MHz, while the Yagi might only perhaps have 300-800 KHz SWR bandwidth depending on its design frequency. As I have always said, there is never a free lunch. In the case of the LPDA, the wider bandwidth is traded off for the reduced gain.
Pros and Cons of an LPDA

A typical LPDA antenna mounted on a tower.
A typical multi-band yagi often has several limitations and design compromises that lead to sub-optimal performance on several bands. A multi-band resonant Yagi is most feasible when the adjacent bands in question are harmonically related. If some bands are not harmonically related, then it is necessary for them to be significantly apart. Thankfully, the amateur radio HF bands by and large fulfill these criteria. Yet, optimum forward gain and the front-to-back ratio is rarely realized on all bands. Even when the electrical lengths of various elements of a Yagi are optimized by various means, it is almost always quite difficult to maintain optimum element spacing. Furthermore, there is usually a significant interaction between different elements of a multi-band Yagi that results in difficulties in tuning and optimizing the antenna performance. Obtaining good SWR, radiation efficiency, directivity, F/B ratio, etc may not always be easy. They may vary from band to band. As a consequence, the net result obtained from such a Yagi is usually without fail a compromise we amateur radio operators have to live with.
At this point, someone might ask, how about a SteppIR or an Optibeam antenna? Aren’t these antennas designed to overcome most limitations? No, not really… SteppIR antenna manages to optimize the element lengths but they do not optimize the element spacing. The Optibeam design addresses most of the compromises related to both element length and spacing but in the end, the design leads to a large number of elements. For, instance, a 4-band, Optibeam with a performance like a basic 3-element Yagi will have around 10-12 elements. It is because, unlike a typical mono-band Yagi, all the elements don’t work together. About 3 elements are active per band while the other ones are inactive. The Optibeam is essentially a cleverly designed antenna where a more-or-less, separate set of Yagi elements for each band are placed on a single boom with a spatial offset from one another.
16-el LPDA Typical Radiation Pattern.
Let us say, a 7-29 MHz broadband antenna will have uniform SWR, radiation impedance, forward gain, F/B ratio, etc for all frequencies between 7-28 MHz segment irrespective of whether it is just the amateur bands or any other intermediate frequency. On the other hand, a multi-band antenna is tailored to only cater to small segments of frequency bands (ones it is designed for) between the 7-28 Mhx segment of our example. If you forgive me for presenting a rather crude analogy, I would say that the multi-band antenna is like several pieces of rocks discretely placed across a large puddle of water to allow one to step on each rock to cross the puddle, whereas, the broadband antenna is akin to a proper bridge that lets you walk across the water puddle with ease.
If the pieces of rocks (like in the case of a Yagi) were to be positionally displaced due to any reason, then it would make things difficult. Just like a structural anomaly or distortion will quite easily detune a Yagi which will affect not only one band but perhaps several of them. However, an LPDA will not have any such issues. An LPDA is quite immune to performance deterioration of electrical characteristics on account of change in height above ground or even small physical distortion of the antenna structure while most often a multi-band Yagi will require retuning the antenna.
Furthermore, even though a Yagi may be multi-band, it would rarely even cover the entire spans of any of the amateur radio bands which have been allocated. Each band that is covered by a Yagi only allows partial coverage. Therefore, Yagi antenna users almost always need to make a choice before deploying their antennas as to which segment of any particular band they might like to focus on. If they focus on the lower band segment then the upper segment would be a compromise. Often amateur radio operators use an external antenna tuner (ATU) to overcome the problem but it does not address the core issue and hence is hardly an elegant solution. It does not correct the underlying problem but only masks it to make one believe that all is well, whereas actually, it is not… We will dwell on the downside of using an ATU to mask problems the way amateur radio operators often do, in a separate article.
Structure of a typical LPDA and its variants
Let us now take a brief look at the physical and electrical structure of a typical Log-Periodic Dipole Array (LPDA) antenna. We will also examine various variants of the typical antenna as we go on. Some of these variants are the Fishbone LPDA, Zig-Zag LPDA, and the Log-Periodic Vertical Array (LPVA). Of course, there are several other variants but let us keep it simple at the moment. There are also other LPDA configurations that are more suited for use at upper UHF and microwave bands like the Log-Periodic Tooth Array, Slot Array, etc but we will not dwell into these structures since they are not used for amateur radio HF, VHF, or UHF applications.
 1")
Standard and Zigzag LPDA configurations.
Secondly, though the directors of a Yagi antenna are shorter, the reflector is longer than the driven element, and the physical shape is tapered but not like a triangle. whereas, an LPDA antenna structure looks more like a triangle or perhaps a triangle that is chopped close to its apex to resemble a geometric trapezoid. Moreover, an LPDA typically has a far longer boom length with many more dipole elements in comparison to a Yagi antenna.
The typical LPDA structure that we have described so far comprises of tapered lengths of multiple straight dipole elements that are perpendicular to the boom.
A well-known geometric structural variant of the typical LPDA is the Fishbone Array. The physical structure resembles that of a fishbone and hence this name, Sometimes, the Fishbone array antenna is deployed as a harness of wires around a skeletal structure on a boom, and then it tends to resemble a spider web. Therefore, such a wire harness variant of the fishbone array is often called Telerana antenna, where the term Telerana comes from Spanish and it means spider web.
Another variant of the Typical LPDA is the Zig-Zag Log-Periodic Array. This antenna is geometrically identical to the typical LPDA, however, the antenna element feed mechanism is entirely different. Unlike a normal transmission line segment driven LPDA, the Zig-zag array is cleverly configured to provide the drive to each dipole by connecting the far-end of a dipole element to the corresponding end of the next dipole element. The other end of the second dipole is connected to the corresponding near-end of the next dipole and so no. This way of connecting adjacent dipole ends forms a zig-zag pattern. The end connections are made using wire conductors. This form of feeding all elements of the LPDA is effectively identical to the central transposed TL feed mechanism from the electrical perspective. The zig-zag feed configuration produces an identical RF current phase relationship on LPDA elements as produced by the transposed TL feed method.
Yet another variant, though strictly not an LPDA since it uses monopole elements instead of dipoles, is the Log-Periodic Vertical Array (LPVA). The principle of the Log-Periodic relationship between the elements of this antenna is similar to that of the standard LPDA. The LPVA has its own typical advantages as well as disadvantages in comparison to the LPDA. The most important advantage is that the LPVA may be made entirely using wire elements. It can easily be deployed quickly in field operations and also taken down as quickly. Since it may be made of flexible wires, it can easily be packed into a small bundle and carried around for re-deployment at a different location. It does not require any tower, mast or antenna rotators. no structural preparation is required prior to deployment. Moreover, the LPVA inherits low-takeoff angle properties of a vertical monopole antenna and hence is extremely suitable for long-range (DX) communication.
However, the biggest downside of the LPVA configuration is that once deployed, it will produce a beam only in the fixed direction of its orientation. To change beam heading, the LPVA has to be taken down and re-deployed with a different directional orientation. Nevertheless, due to its portability and excellent performance, it is often used on HF bands for field operations and also for point-to-point communication applications.

Trapezoidal stack of 2 LPDA antennas in an array.
One might ask at this stage, what is the big deal? Various types of antennas can be stacked to form stacked arrays. So, what is so special about the stacking of LPDA? … Well, there is something rather unique in the way LPDA antennas are stacked. That is why we call this unique stacked structure a Trapezoidal LPDA. Normally, stacked arrays, like the Yagi stack, etc are formed by placing the constituent antennas at calculated spacing w.r.t one another. The optimized spacing distance is related to the wavelength of the operating band for which we design the antennas. In the case of a typical Yagi stack, the individual Yagi antennas are placed parallel to each other.
However, in the case of LPDA stacks, parallel stacking will not work. Why not? The reason is that the LPDA operates across a very large band of wavelengths (or frequencies). So, how do we determine the optimum stacking distance? If the LPDA were to operate across 7-29 MHz which means approximately from 40m to 10m wavelengths, If our stacked LPDA were to work well over the whole range, then what stacking distance do we choose? Unlike the Yagi stack which is a narrow band antenna, in the case of LPDA stack, we simply cannot choose any single stacking distance to place the LPDA antennas in parallel.
Well, what do we do? We will leverage the unique property of an LPDA that only a few elements of the LPDA are active for any frequency while all the other elements are typically dormant. For instance, in our 7-29 MHz LPDA example, only the shortest elements at the narrow end of the LPDA will work on the 10m band while only the longest elements at the other end of the boom will work on the 40m band. The intermediate frequency band will excite a few other elements along the length of the boom.
Therefore, in view of the above, the large element-end which is active on the 40m band must be optimally spaced with respect to the other LPDA of the stack at an optimal stacking distance required for 40m. similarly, the stacking distance of LPDA antennas in the stack at its narrow end must be optimum for the 10m band. Since the wavelength of 10m is 1/4th of 40m, the narrow-end stacking distance should be 1/4th of the stacking distance at the 40m broad-end. Hence, to achieve optimum stacking performance the LPDA cannot be stacked with individual LPDA booms placed in parallel. The stacking distance must taper. Consequently, we end up with a trapezoidal-shaped stacking arrangement instead of the commonly known parallel stacking arrangement. That is why the stacked LPDA is often called Trapezoidal LPDA.
How does an LPDA work?
So far, in our discussion, we have covered the geometric structure of the LPDA antenna, its several variants, pros and cons, and several of its characteristics. Let us now dig deeper and try to figure out how an LPDA works. Looking at a large number of elements, one might tend to believe that the LPDA is perhaps a very high gain antenna. However, that is not really true. A large number of elements do not contribute to a proportionately higher gain but they are primarily responsible for the broadband characteristics of the antenna.
As we mentioned earlier, unlike a Yagi where all elements contribute to its forward gain across a narrow band around its design frequency, most of the elements of the LPDA are inactive while only a few elements that are resonant near the frequency of RF excitation are active at any point in time. Usually, 3 elements or perhaps a few more (depending on the design) may be active at a time. As we sweep the excitation frequency across the wide operating bandwidth of the LPDA from low to high, we will notice that the set of elements that become active will shift from the longest element and gradually shift towards smaller length elements till the shortest element finally becomes the one that is active at the highest frequency end of the antenna bandwidth. The transition from one set of the active element to another is usually smooth and seamless.
One may visualize it like a sprint medley relay race where one athlete hands over the baton to the next, while still running, in a smooth manner, without discontinuity or stoppage. In the case of the LPDA, with the change in excitation frequency, the transition from one set of active elements to the next is also discontinuous with a smooth rollover.
 2")
Excitation of LPDA elements at different frequencies.
Check out the animated illustration depicting the transition of an active set of elements as we alter the frequency. The red-colored arcs represent the magnitude of excitation current on each element. Please also note that in the illustration, there are 2 additional unconnected elements in front of the LPDA. These are parasitic directors. Although these parasitic elements are not a part of a typical LPDA, we often add these on the boom of practical LPDA structures to provide some additional gain boost at the higher end of the antenna bandwidth… For the time being, as we progress through the narrative, you may ignore the effect of these elements.
In between the longest and the shortest elements at the two extreme ends of the boom, there are many dipole elements with gradually tapering lengths. The number of intermediate elements, their mutual spacing, and the rate of taper of elements (or the angle of taper of element lengths as seen from the front of the antenna structure), all contribute towards the overall performance of the LPDA. The antenna designer can control and tailor the overall characteristics and performance of the LPDA by correctly choosing all these parameters. We will come to this in a moment. For now, let us see how the transition from one set of active elements rolls over to the next with the change in frequency.
Let us recall various principles of element length behavior that we discussed in our Article on Yagi Antennas. Those who are unfamiliar with the concept, may please read it before moving further. Now, assuming that we are good to go, let us see what happens when the LPDA is driven at its lowest design frequency. The longest element at one extreme end is a bit longer than what is needed for resonance will now behave like a reflector. The second element that is slightly shorter will be at resonance and act as a primary driven element. The next shorter element ahead of this one will behave like a director. Let us pause for a moment and see what we have. We have a situation like that of a 3-element Yagi at the lowest end of the antenna bandwidth. Although, other nearby elements apart from these three might also contribute marginally towards gain but for now, we will only consider 3 elements at a time so as not to complicate our narrative.
To get a better insight on how it works, continue to read the following section.
Let us now gradually increase the drive frequency. What would happen? The longest element which was the reflector will become far more inductive and develop a higher impedance and start becoming inactive, while the second element that was acting as the primary driven element will now be slightly longer than what is needed for resonance and will begin to play the role of a reflector. the third element that behaved like a director at the lower frequency earlier will now acquire the traits of the primary driven element. The next smaller element (4th) which was inactive so far will now take the role of the director at this new higher frequency. So, where do we stand? Once again, we have 3 elements that behave similar to a Yagi but now it is a higher frequency segment. As we continue to increase the excitation frequency, this smooth rollover process between LPDA elements continues. A set of 3 adjacent elements will always behave as active elements at any frequency within the LPDA antenna bandwidth. With the increase in frequency, the 3 active element set will shift forward leaving the longer element behind as inactive. This will happen till we reach the highest design frequency where the shortest 3 elements will be active and provide gain… Please refer to the animated illustration above to visualize what I just described.
What we described above, in a nutshell, broadly describes how an LPDA works to provide forward gain with low SWR across a very broadband. However, please note that my reference to a Yagi while describing the behavior of a set of 3 active elements at one time was loose because the Yagi has parasitic elements while all elements of the LPDA are driven. My objective was to convey the identical notion of forward gain.
OK… if the set of 3 elements of the LPDA in our narrative did not actually form a Yagi, then would their behavior be similar? Yes, absolutely… Let us see how.

Broadband SWR plot of an LPDA
This brings us to an important electrical feature of the LPDA. Each of the transmission line sections between two adjacent elements of the LPDA is transposed to drive adjacent dipole with 180° phase reversal. This is very important. Without transposing feeder sections, the LPDA will not function. Now, if you need, refer back again to our article on Yagi antennas. You will remember that we stressed that the parasitic elements must be joined (short-circuited) in the middle. It was necessary to achieve 180° phase reversal of currents flowing in the parasitic elements because short-circuiting of elements in the middle was absolutely necessary for the Yagi to produce forward-oriented radiation lobes. In the case of LPDA elements, since they are all electrically driven, they cannot be short-circuited in the middle. Therefore, the required 180° phase reversal is physically provided by transposing the interconnecting TL segments.
Based on what we have discussed so far, does it mean that an LPDA may never produce a gain higher than that of a 3-element Yagi? No, that is not true. depending on the design of the LPDA, it may be configured so that the active set of elements at any time may be more than 3. In our explanatory example, we kept the narrative simple. however, an LPDA may be designed to have more than one effective director in an active element set thus producing a higher gain. Moreover, some of the elements far away from the active set may not be always inactive. Many of them might still be able to produce sufficient radiation that could constructively interfere with the radiation from the main active elements to further enhance gain. The antenna designer takes care of all this through mathematical modeling.
Before we conclude, let me summarize a few important design aspects and parameters of an LPDA. One aspect is the total number of elements in an LPDA. The more the number of elements between the shortest and the longest elements at the ends of the boom, the lower is the SWR ripple across the entire broad bandwidth of the antenna. There are two other important parameters that determine an LPDA design. The first one is the inter-element spacing. The inter-element spacing is not uniform but progressively increases at the longer element section of the boom. The other is the angle of taper of the shape of the LPDA which determines the ratio of the lengths of two adjacent elements. The first parameter which determines the element spacing ratio is designated as Sigma (σ), while the other parameter that determines the structural taper is designated as Tau (τ). Both are greek alphabets and define two very vital design parameters. Not that most radio amateurs need to worry about these parameters, but I am sure that it is always good to know… Hope you enjoyed reading.
 3")

(21 votes, Rating: 5.00) - Please vote the article with your valuable star rating. Thanks! Basu (VU2NSB)


Ham Rig Reviews Coming Soon
SSN SSNf(10.7) – Real-time Solar Data


